Bake It ‘Til You Make It: Your Ultimate Guide to Cake Perfection is the definitive resource for cake lovers everywhere. Dive into the sweet world of baking and discover the secrets to cake glory!
Table of Contents
- Understanding Cake Basics
- Essential Baking Tools and Ingredients
- Types of Cakes and Their Characteristics
- Cake Baking Techniques
- Decorating Your Cake Like a Pro
- Troubleshooting Common Cake Problems
- Storing and Serving Your Cake
- FAQs
- Conclusion
Understanding Cake Basics
Before diving into the world of cake baking, it’s essential to grasp the foundational elements that go into creating a delightful cake. Cakes are primarily made from three main components: flour, sugar, and leavening agents. Understanding how each ingredient plays a role in the final product can significantly elevate your baking game.
The Science of Ingredients
-
Flour: The backbone of any cake, flour provides structure and stability. Different types of flour yield different textures; all-purpose flour is a reliable choice, while cake flour can create lighter, fluffier results.
-
Sugar: Besides sweetening, sugar helps retain moisture, contributes to browning, and enhances the overall flavor. Brown sugar, with its molasses content, gives cakes a richer flavor and denser texture.
-
Leavening Agents: These include baking soda and baking powder, essential for helping the cake rise. Understanding how to use these correctly is crucial!
Whether you’re a novice baker or a seasoned pro, understanding these basics sets the stage for masterpiece creations. For further reading on the chemistry of baking, check out resources like BBC Good Food.
Essential Baking Tools and Ingredients
No successful cake baking session is complete without the right tools and ingredients. Having these will not only make your baking experience smoother but will also enhance your cake’s quality.
Baking Tools
-
Mixing Bowls: Invest in a set of mixing bowls in various sizes for ingredient mixing. Glass or stainless steel options are preferred for their durability.
-
Measuring Cups and Spoons: Accurate measurements are imperative in baking. A set of dry and liquid measuring cups is a must.
-
Electric Mixer: While you can mix by hand, an electric mixer saves time and effort—especially for whipping cream or mixing denser batters.
-
Spatula and Whisk: Silicone spatulas are perfect for scraping bowls, while a whisk is essential for mixing dry ingredients and for aerating liquids.
-
Cake Pans: Different shapes and sizes can affect baking time and texture. A set of round and square pans is recommended for versatility.
-
Cooling Rack: This allows your baked cakes to cool properly, preventing soggy bottoms.
Essential Ingredients
-
High-Quality Flour: Going the extra mile for the right flour can make all the difference.
-
Fresh Eggs: Eggs should be at room temperature for maximum aeration.
-
Unsalted Butter: Better flavor control; you can add salt as needed in your recipes.
-
Pure Vanilla Extract: This provides depth in flavor that imitation extracts simply can’t match.
When you have the right tools and ingredients in your arsenal, you’re already on your way to fabulous cakes. For more tips on essential kitchen tools, check out Food Network.
Types of Cakes and Their Characteristics
Knowing the different types of cakes can help you choose the right one for your occasion or mood. Here’s a rundown of popular cake types:
1. Butter Cakes
Butter cakes are made by creaming butter and sugar, then adding dry ingredients and eggs. They are moist and rich, perfect for a layered cake. Examples include:
- Vanilla Cake
- Chocolate Cake
2. Sponge Cakes
Light and airy, sponge cakes use whisked eggs to create their structure, resulting in a delicate texture. They serve as great bases for fruit and whipped cream toppings. Think:
- Genoise
- Angel Food Cake
3. Pound Cakes
These cakes traditionally consist of a pound each of butter, sugar, eggs, and flour. Their dense texture makes them perfect for serving with fruit compotes or chocolate sauces.
4. Chiffon Cakes
Chiffon cakes are a cross between a sponge cake and a butter cake, using oil rather than butter, resulting in a moist, flavorful cake that’s lightweight yet decadent.
5. Cheesecake
While technically more of a custard, cheesecake is beloved for its creamy texture and can have various flavors, from classic New York-style to fruit-infused variations.
Understanding these categories enables you to decide which cake suits your event or craving. Have fun experimenting with different types, and don’t hesitate to mix and match flavors for unique results!
Cake Baking Techniques
Now that you’re familiar with the types of cakes, let’s explore some essential baking techniques that will take your cakes to the next level.
1. Creaming Method
This method involves beating butter and sugar together until light and fluffy. It introduces air into the batter, helping your cake rise beautifully. Be patient; this can take several minutes.
2. Mise en Place
French for “everything in its place,” this technique involves prepping all your ingredients before starting to bake. This helps streamline the process and minimizes the chances of forgetting any ingredients.
3. Folding
When incorporating whipped egg whites or whipped cream into a batter, fold gently to maintain airiness. Use a spatula and a gentle scooping motion to preserve that fluffy texture.
4. Testing for Doneness
A reliable method for checking your cake’s doneness is inserting a toothpick into the center. If it comes out clean or with just a few crumbs, you’re good to go.
5. Cooling Properly
Allow your cakes to cool in the pan for about 10 minutes before transferring them to a cooling rack. This prevents moisture from building up at the bottom and makes for a better texture.
These techniques not only streamline your baking process but also enhance the quality of your cakes.
Decorating Your Cake Like a Pro
Once your cake is baked and cooled, the fun really begins with decorating! Here are some tips to help make your cake look as good as it tastes.
1. Simple Frosting Techniques
A basic buttercream frosting is versatile and delicious. For a smooth finish, use an offset spatula to spread the frosting evenly. For a rustic look, use a knife or the back of a spoon.
2. Layering Flavors
Consider filling your cake with fruit preserves, curds, or flavored creams between layers. Not only does this add flavor, but it also visually elevates your cake.
3. Using Piping Bags
Invest in a set of piping bags and various tips. Even simple frosting can be transformed into a beautiful design with the right technique. Practice makes perfect!
4. Garnishing with Fresh Fruits and Nuts
Topping your cake with fresh fruits, edible flowers, or chopped nuts adds both texture and a burst of color, making it visually appealing.
5. Edible Decorations
Think outside the box! Candies, chocolate shavings, or themed decorations can elevate your cake for special occasions. Get creative and customize your designs!
The sky’s the limit when it comes to decorating your cakes. Don’t shy away from experimenting, and remember that practice makes perfect!
Troubleshooting Common Cake Problems
Even seasoned bakers encounter problems from time to time. Here are some common issues you might face along with their solutions.
1. Cake Not Rising
If your cake fails to rise, check if your leavening agents are fresh and active. Also, ensure you haven’t over-mixed your batter, which can develop gluten and impede rising.
2. Dry Cake
A dry cake is typically a result of overbaking. Keep an eye on your cake towards the end of the baking time. Also, adding ingredients like Greek yogurt or sour cream can help retain moisture.
3. Cake Sticking to the Pan
Always line your cake pans with parchment paper and grease them well to ensure easy removal. If a cake does stick, allow it to cool a bit longer before attempting to remove it.
4. Uneven Baking
To avoid uneven baking, be sure to rotate your pan halfway through cooking. Also, avoid opening the oven door frequently, as this can cause fluctuations in temperature.
5. Frosting Melting Off Cake
If your frosting is sliding off your cake, it might be too soft. Try chilling your cake for a while before frosting, and ensure your frosting has the right consistency.
By understanding these common pitfalls, you’ll be better prepared to tackle any baking challenge that comes your way!
Storing and Serving Your Cake
Once your cake is freshly baked and decorated, you’ll want to ensure it stays delicious and visually appealing for as long as possible. Here’s how to store and serve your cakes properly.
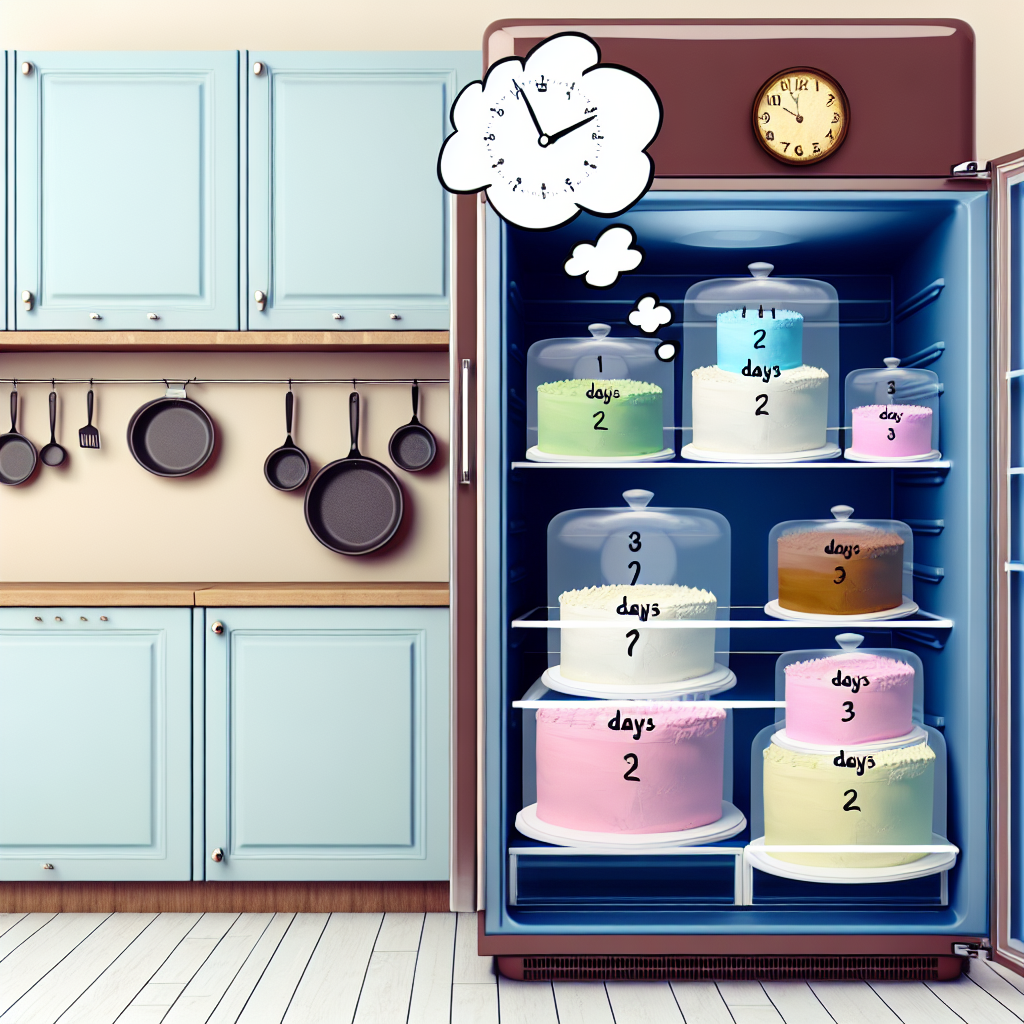
1. Storage Solutions
-
Room Temperature: Cakes can typically be stored at room temperature for 2-3 days, especially if covered tightly with plastic wrap.
-
Refrigeration: For cakes with dairy-based frostings or fillings, refrigeration is necessary. To prevent drying, wrap your cake tightly.
-
Freezing: Cakes can be frozen for up to three months. Wrap them well in plastic wrap and foil. Thaw in the refrigerator before serving.
2. Serving Tips
-
Presentation: Use a cake stand for an elevated display. Simple garnishes can enhance visual appeal.
-
Slicing: A warm knife dipped in hot water can help you make cleaner cuts, especially with cream-filled or sticky cakes.
-
Pairing: Enhance your cake experience with coffee, tea, or even ice cream for a delightful treat!
Proper storage and serving techniques will ensure your cake remains fresh and delicious, inviting friends and family back for seconds!
FAQs
1. How do I prevent my cake from sinking in the middle?
Ensure you’re using the right measurements and not overmixing your batter. Also, check your oven temperature; it could be running too hot.
2. Can I bake a cake in advance?
Absolutely! You can bake and freeze a cake up to three months in advance. Thaw it out and decorate it before serving.
3. What’s the difference between baking soda and baking powder?
Baking soda requires an acid to activate, while baking powder already contains an acid and can work on its own.
4. How can I make my cake moister?
Adding ingredients like applesauce, sour cream, or yogurt can help retain moisture. Just be careful not to overbake!
5. Can I convert a regular cake recipe to a gluten-free one?
Yes, substituting with gluten-free flour is a popular choice. Just ensure you adjust the liquid and leavening agents accordingly.
Conclusion
Now you’re armed with all the knowledge you need for cake perfection! Whether you want to master the art of baking or simply impress your friends and family with your culinary creations, remember that baking is both an art and a science. So, roll up your sleeves, preheat your oven, and start creating delicious masterpieces.
If you’ve enjoyed this guide, please share it with your friends and family. After all, the joy of cake is best when shared!