Sweet Bites: A Step-by-Step Guide to Perfect Cake Pops
If you’ve ever dreamed of creating those delightful, bite-sized treats that are perfect for any occasion, you’re in the right place. Cake pops are not just another dessert; they’re an experience that combines flavor, fun, and creativity. Let’s dive into the art of making cake pops, ensuring you end up with gorgeous and delicious sweet bites every time.
Table of Contents
- Introduction
- Ingredients You’ll Need
- Essential Tools for Cake Pops
- Step-by-Step Guide
- Decorating Your Cake Pops
- Storage and Shelf Life
- Cake Pop Variations
- Frequently Asked Questions
- Conclusion
Introduction
Cake pops are simple yet sensational, combining the fluffy goodness of cake with the fun of candy coating. This guide will help you navigate making cake pops from scratch, ensuring you impress everyone with your sweet masterpieces.
Ingredients You’ll Need
To whip up some scrumptious cake pops, gather the following ingredients:
Cake Base
- Cake: You can use any type of cake—vanilla, chocolate, or even red velvet. A boxed mix will work just fine if you’re short on time.
- Frosting: Choose any flavor that pairs well with your cake. Cream cheese frosting works wonders with red velvet, while chocolate frosting complements chocolate cake perfectly.
Coating
- Candy Melts: These are specially formulated for coating cake pops and come in various colors and flavors. You can choose classic white for a more elegant look or vibrant colors for fun occasions.
- Sprinkles: These are great for adding a festive touch. Use different shapes and colors to fit the occasion.
Optional Fillings
- Flavored Extracts: Options like vanilla, almond, or mint can elevate the flavors of your cake pops.
- Chocolate Chips: For an added texture, mix in some mini chocolate chips into your cake mixture.
Essential Tools for Cake Pops
Having the right tools makes the cake pop-making process a breeze. Here’s what you’ll need:
Basic Equipment
- Mixing Bowls: For combining cake and frosting.
- Baking Sheet: To cool your baked cake.
- Parchment Paper: Line your baking sheets for easy cleanup.
Cake Pop Tools
- Cake Pop Sticks: These can be found at craft stores or online. Opt for sturdy ones that won’t break during use.
- Floral Foam or Cake Pop Stand: This is useful for letting your cake pops set upright.
- Microwave-Safe Bowl: For melting your candy melts.
Step-by-Step Guide
Creating cake pops can seem daunting, but I promise you, it’s easy and fun! Follow these steps closely for cake pops that will wow your friends and family.
Step 1: Bake the Cake
Start by baking your cake according to the instructions on the box or your favorite recipe. Allow it to cool completely on a baking sheet.
Step 2: Crumble the Cake
Once the cake is cool, crumble it into a large mixing bowl using your hands. You want it to resemble fine crumbs, with no large pieces left.
Step 3: Mix in the Frosting
Add your frosting to the crumbled cake. Start with a small amount (around 1/2 cup) and mix well. You want the mixture to be moist but not too wet. If it’s too dry, add more frosting.
Step 4: Form the Balls
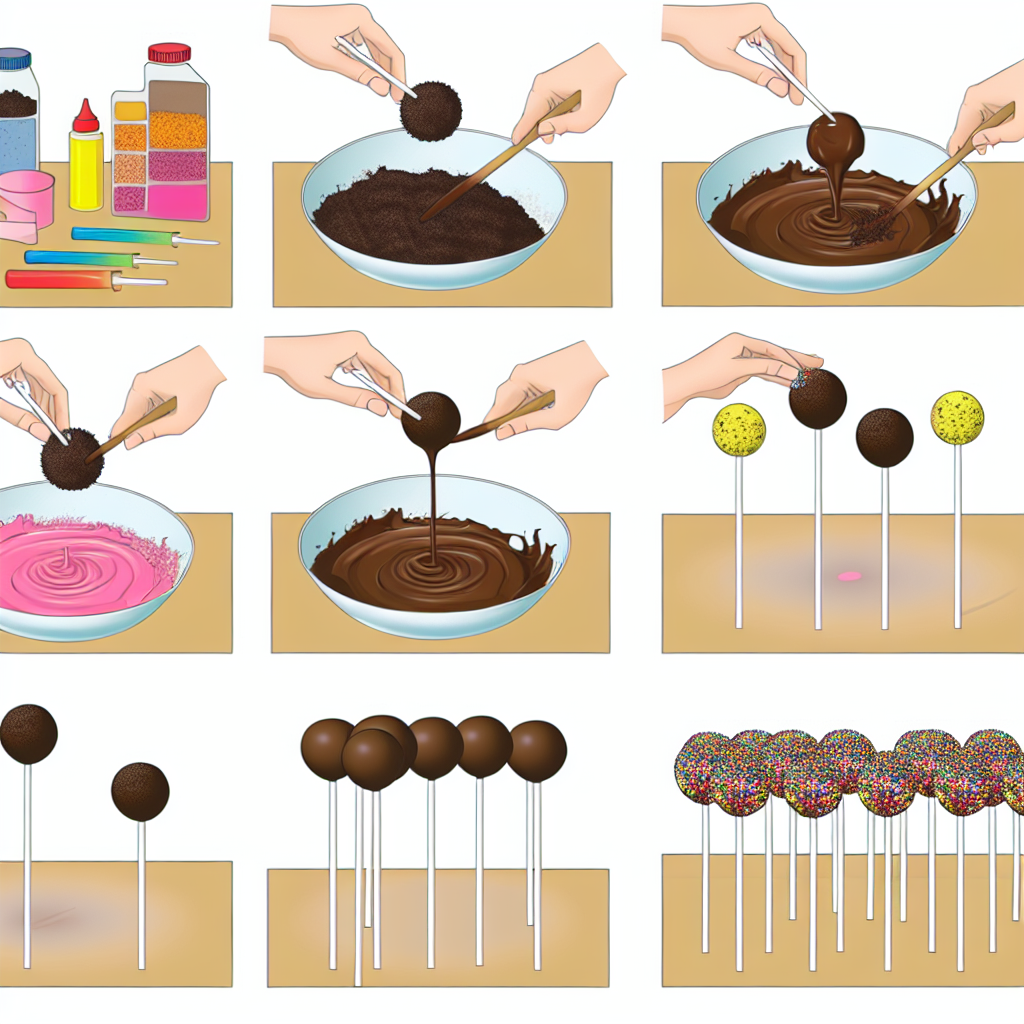
Scoop out about a tablespoon of the mixture and roll it into a ball. Firmly press the ball to ensure it holds its shape. Place the balls on a parchment-lined baking sheet. Continue until all the mixture is formed into balls.
Step 5: Chill the Cake Pops
Refrigerate your cake balls for at least 30 minutes. This step helps them firm up and makes it easier to insert the sticks without them falling apart.
Step 6: Melt the Candy Coating
While your cake balls are chilling, melt the candy melts according to package instructions in a microwave-safe bowl, stirring frequently until smooth.
Decorating Your Cake Pops
Now comes the fun part! Decorating your cake pops opens the door to creativity.
Step 1: Dip the Sticks
Before inserting the sticks into the cake balls, dip the end of each stick into the melted candy coating. This will help secure the stick and keep it in place.
Step 2: Insert the Sticks
Carefully poke the stick into the center of each cake ball. Don’t push it all the way through; about halfway is perfect.
Step 3: Coat the Cake Pops
Now, dip each cake pop into the melted candy coating, ensuring it’s fully submerged. Gently tap the stick on the bowl’s edge to let excess coating drip off.
Step 4: Add Sprinkles
Before the coating sets, add sprinkles or any other decorations while the coating is still wet.
Step 5: Let Them Set
Stick the cake pops into floral foam or a cake pop stand so they can firm up. Let them sit for about 30 minutes or until the coating hardens.
Storage and Shelf Life
To keep your cake pops fresh and delicious, store them properly:
- In the Refrigerator: Cake pops can last for up to 2 weeks stored in an airtight container in the fridge.
- At Room Temperature: If they aren’t coated in chocolate or candy melts, cake pops can last up to 3-5 days at room temperature.
Cake Pop Variations
Don’t hesitate to get creative! Here are some variations you can try:
Flavor Combinations
- Red Velvet with Cream Cheese Frosting: A classic favorite that never disappoints.
- Lemon Cake with White Chocolate Coating: Refreshing and perfect for summer gatherings.
- Peanut Butter Cake with Chocolate Coating: A delicious twist for chocolate and peanut butter lovers.
Themed Cake Pops
- Holiday Themes: Use colors and sprinkles that match holidays. Think red and green for Christmas, pastels for Easter, or even spooky decorations for Halloween.
- Custom Designs: Get crafty with fondant, edible ink pens, or edible glitter to personalize your cake pops for special events or birthdays.
Frequently Asked Questions
1. Can I use store-bought cake?
Absolutely! Store-bought cake is a great time-saver.
2. How do I prevent my cake pops from cracking?
Ensure the cake balls are chilled, and avoid over-dipping them in the melted candy coating.
3. What can I do if my candy melts are too thick?
Add a small amount of shortening or coconut oil to the melts while warming to achieve a smoother consistency.
4. Can I freeze cake pops?
Yes, you can freeze them! Just ensure they are wrapped well to prevent freezer burn and allow them to thaw before serving.
5. What are some common mistakes to avoid?
- Not chilling the cake balls enough before dipping.
- Overloading on frosting, making the mixture too damp.
- Melting the candy melts too quickly, causing them to seize.
Conclusion
Making cake pops can be a delightful and rewarding experience, turning simple ingredients into adorable, delicious bites that bring joy to any gathering. I hope this guide has inspired you to give it a try. If you enjoyed the article, please share it with friends and family so they can join in on the cake pop fun!


